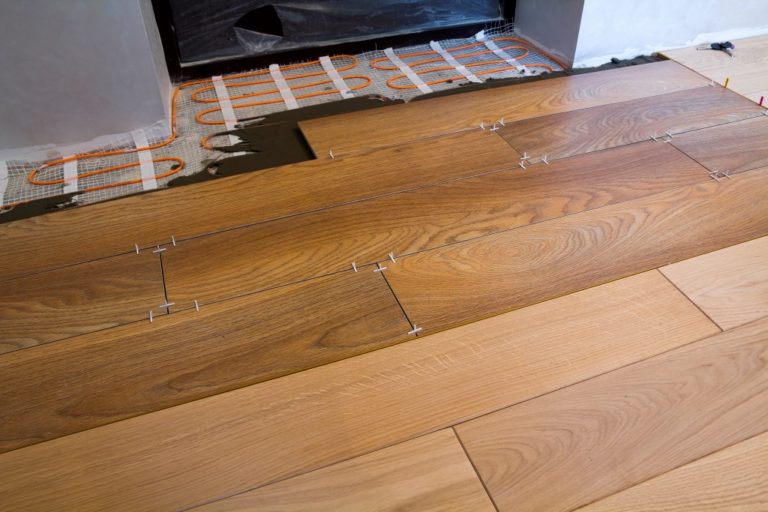
Your floors get stepped on, get wet with droplets of water from raincoats or umbrellas, and soiled with wet paws from your furry friends. These situations where your floor soaks in the water can ruin its material. Waterproofing is the ideal choice if you want to maintain the integrity and longevity of your floors’ durability and beauty.
Waterproofed floors allow you to clean up spills easily and is stain-resistant against pets, parties, and accidents. If you want to enhance the benefits of waterproofed floors, finish it off with epoxy coating best-suited for concrete floors.
Be proactive in treating your wooden floors by making it waterproof to protect it and save you from wasting money on expensive repairs. Here are five steps to waterproof your floor.
Clean the Area
Make sure the floor is free from dirt before applying the waterproofing agent because the sealer can trap the grime on your floors and permanently stain the surface. Move all furniture and other household items away from the area you need to waterproof.
Grab a dry mop or vacuum and thoroughly clean the floor until it is smooth and free of any debris. Finish off cleaning the area by wiping the places you think that still have dirt and dust using a damp clean cloth.
Sanding Wooden Floors
If you are waterproofing wooden floors, you need to sand the area using medium-grit sandpaper to ensure the floor is free from uneven surfaces that can ruin the floor’s appeal. After sanding the floor, ensure the area is free from dust and other debris before starting the waterproofing process.
Acquire Proper Ventilation
Before starting the waterproofing process, ensure you have proper room ventilation. These waterproofing finishes emit toxic fumes. This is a dangerous situation when you are inside confined spaces. Open the windows or the door to allow the flow of fresh air inside the area before applying the first coating of the waterproof finish.
Apply the First Coat of the Waterproofing Agent
Always use a water-based polyurethane wood floor finish as it produces the best results and is environmentally friendly. Pour the content inside a bucket and dip a paint roller or paintbrush inside the bucket.
Start applying the waterproofing finish on your floor by brushing the applicator of your choice in even strokes. Dip it inside the polyurethane-filled bucket when necessary. Leave the first coating to dry for at least two to three hours.
Apply Additional Coatings
After the first coating has wholly dried, apply additional coats of the waterproofing finish to your floor. Allow two to three hours of drying for each additional coating you want to put. Leave the area to completely dry for 24 hours, open windows and doors to ventilate further. In two days, you will have fully waterproofed floors, maintaining longevity and fresh look for years.
Waterproofing is the best way to ensure your floor stays free from moisture damage. You can easily waterproof your floors with the quick and easy steps we have listed, maintaining a durable and fresh floor for a long time.